
Connect via SIP trunking
Twilio
Connect Outbound to your Twilio account using elastic SIP trunking - set up termination, origination, credentials, and import Twilio numbers into Outbound.
Connect a Twilio number to Outbound with elastic SIP trunking, so your agents can make and receive calls on numbers you own in Twilio. Set up termination (outbound) and origination (inbound), add credentials, then import the number into Outbound.
Steps
Create elastic SIP trunking
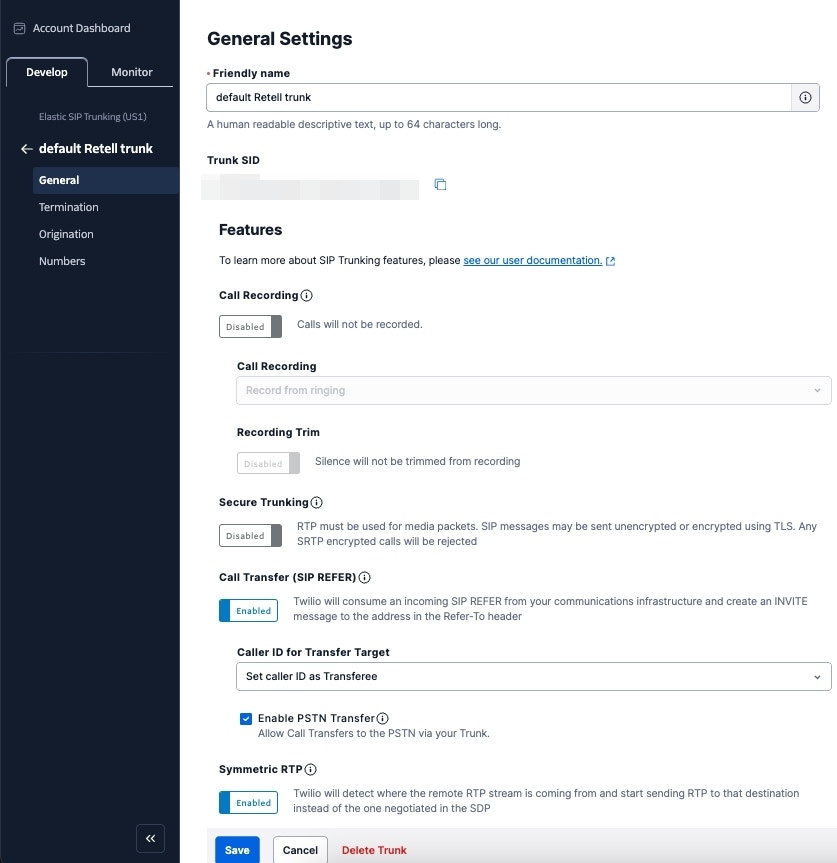
1. Create the trunk, give it a name, and toggle some general settings
2. Set up termination (this is for outbound)
- The termination SIP URI here is important; you'll use it in later steps. Use a localized termination URI near your region. You can expand and view your localized URIs in the Twilio console.
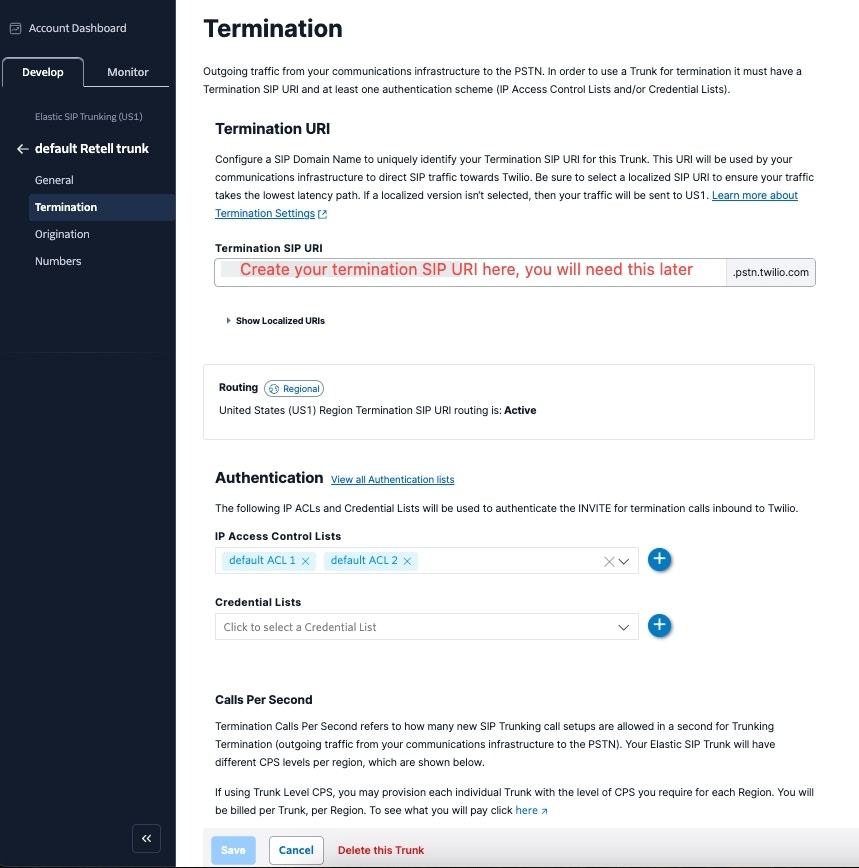
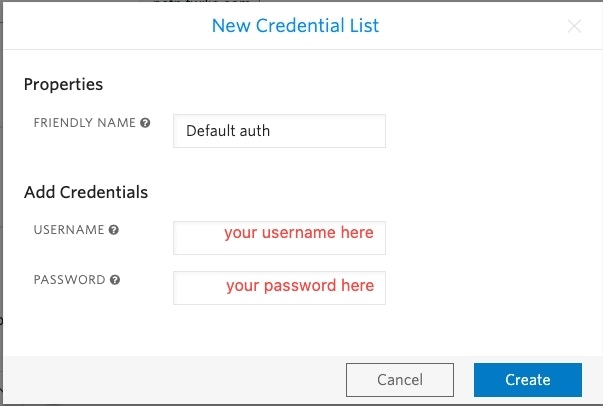
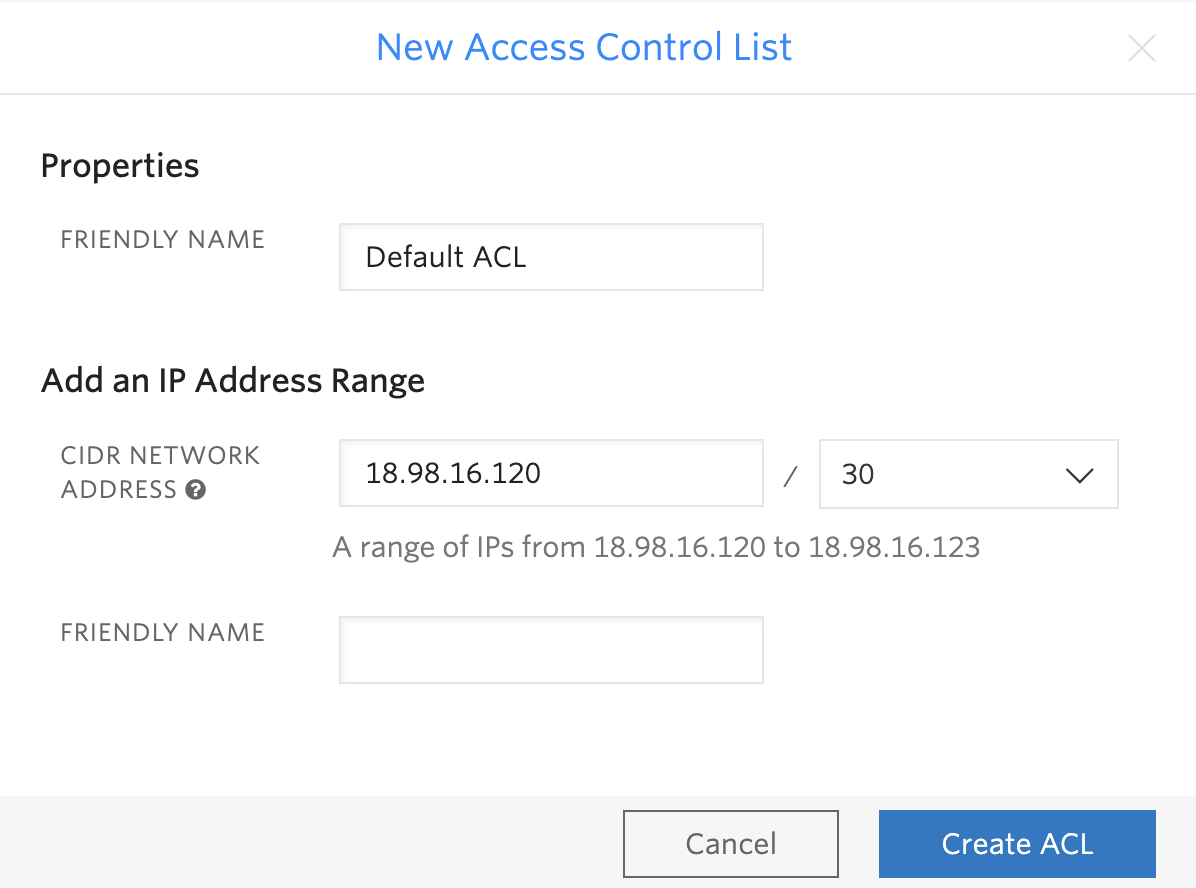
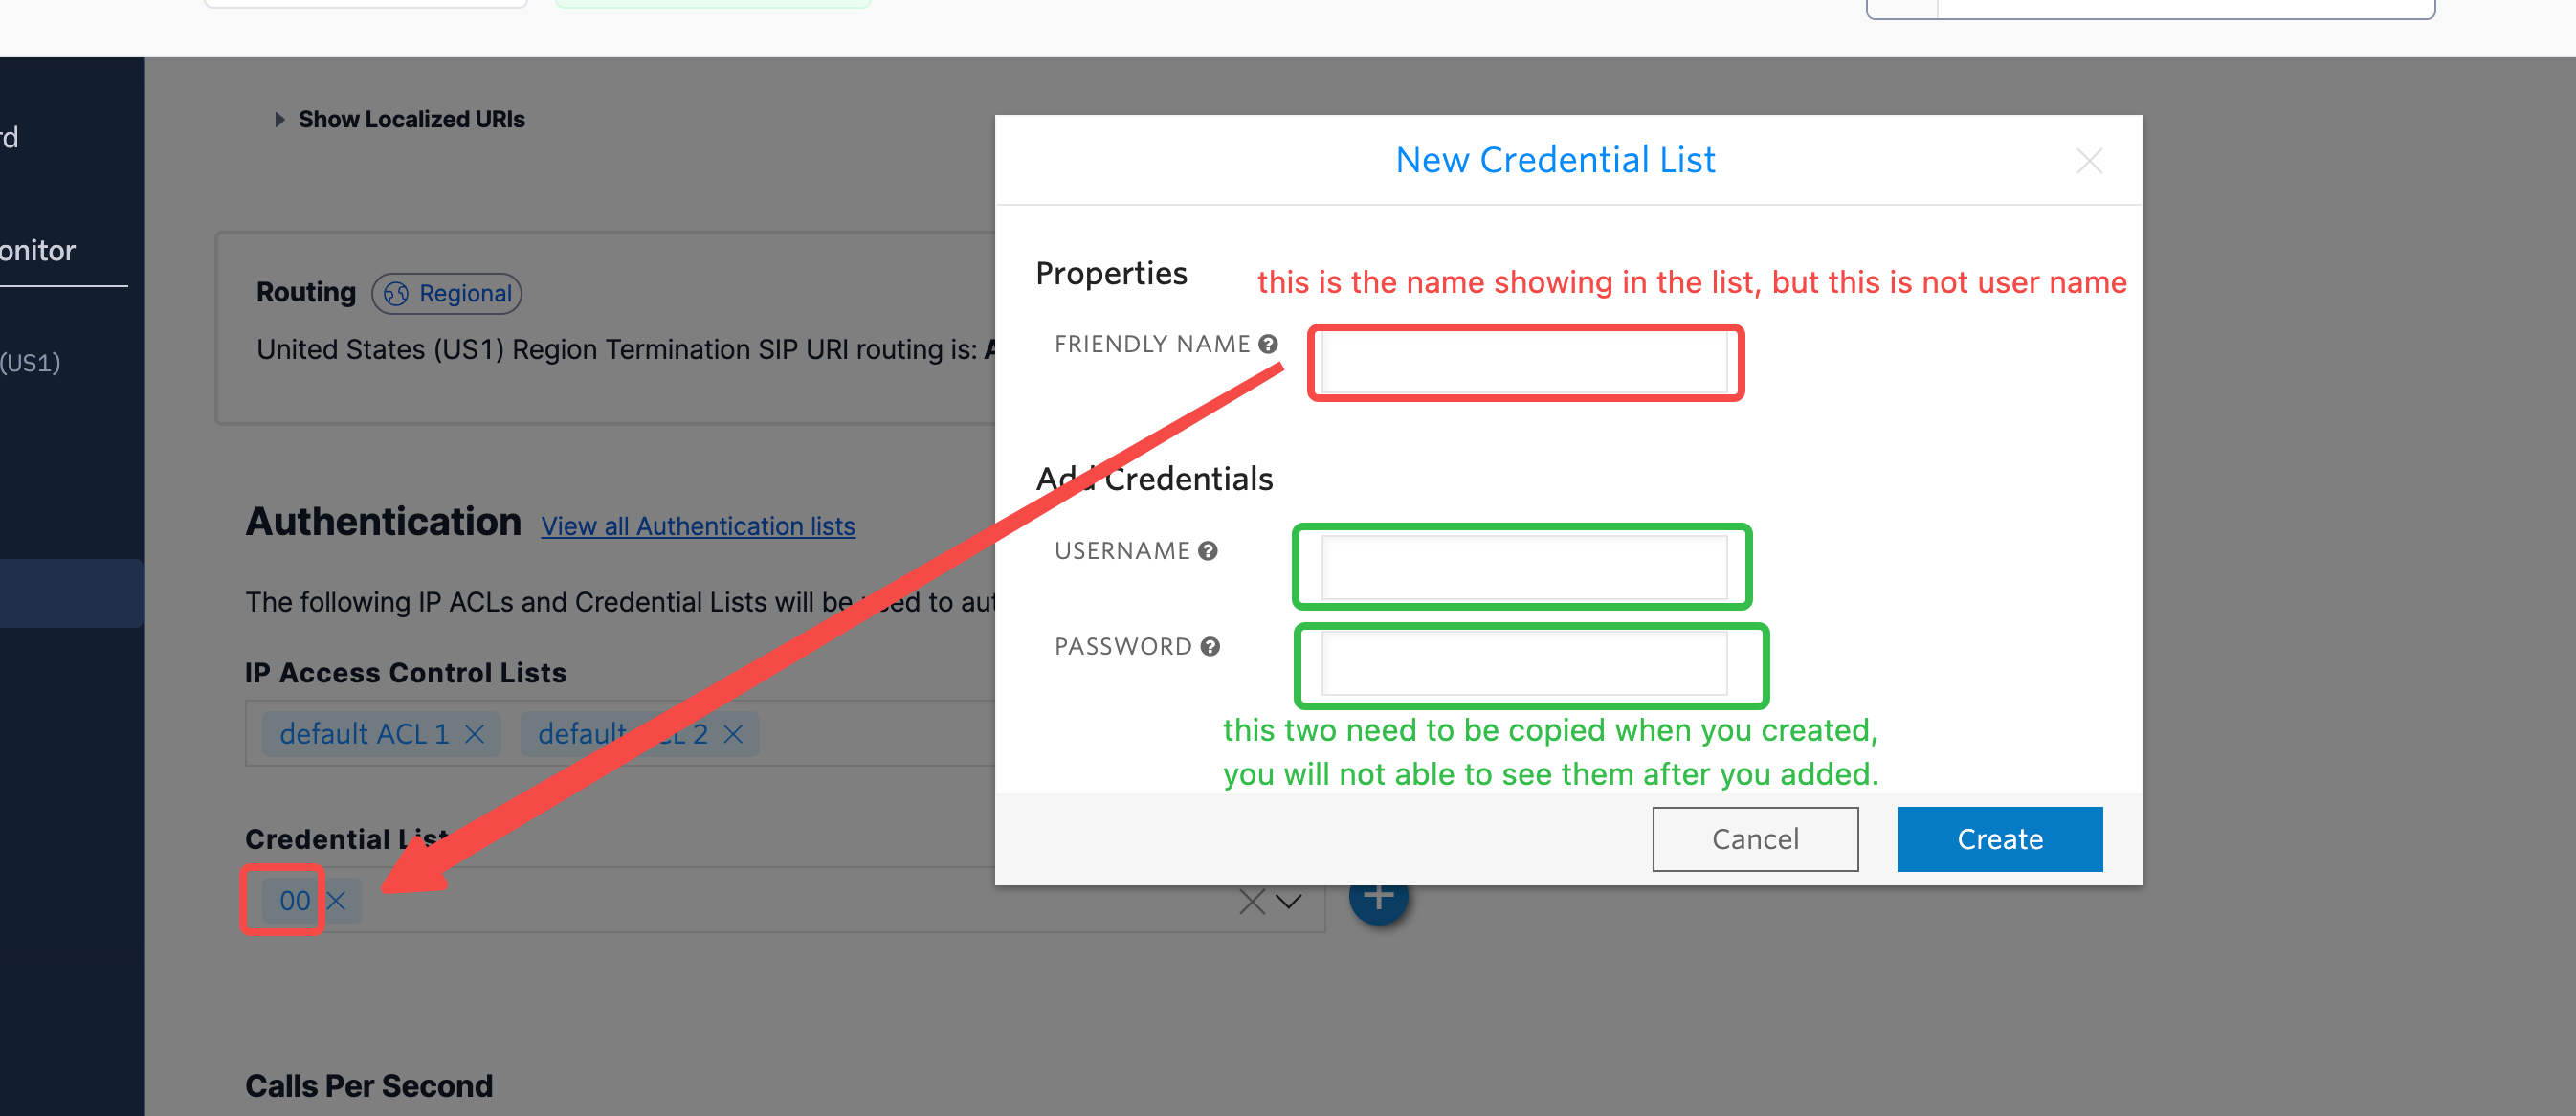
For your elastic SIP trunk to accept our outbound request, you need to whitelist an IP address or create an auth with a username and password.
- If you opt for the auth route, you need to specify the username and password in the next step when importing the number to Outbound.
- You need to whitelist Outbound SIP SBC CIDR block 18.98.16.120/30 like the following:
3. Set up origination (this is for inbound)
- Here you will specify Outbound's SIP server address as the origination SIP URI: sip:sip.retellai.com.
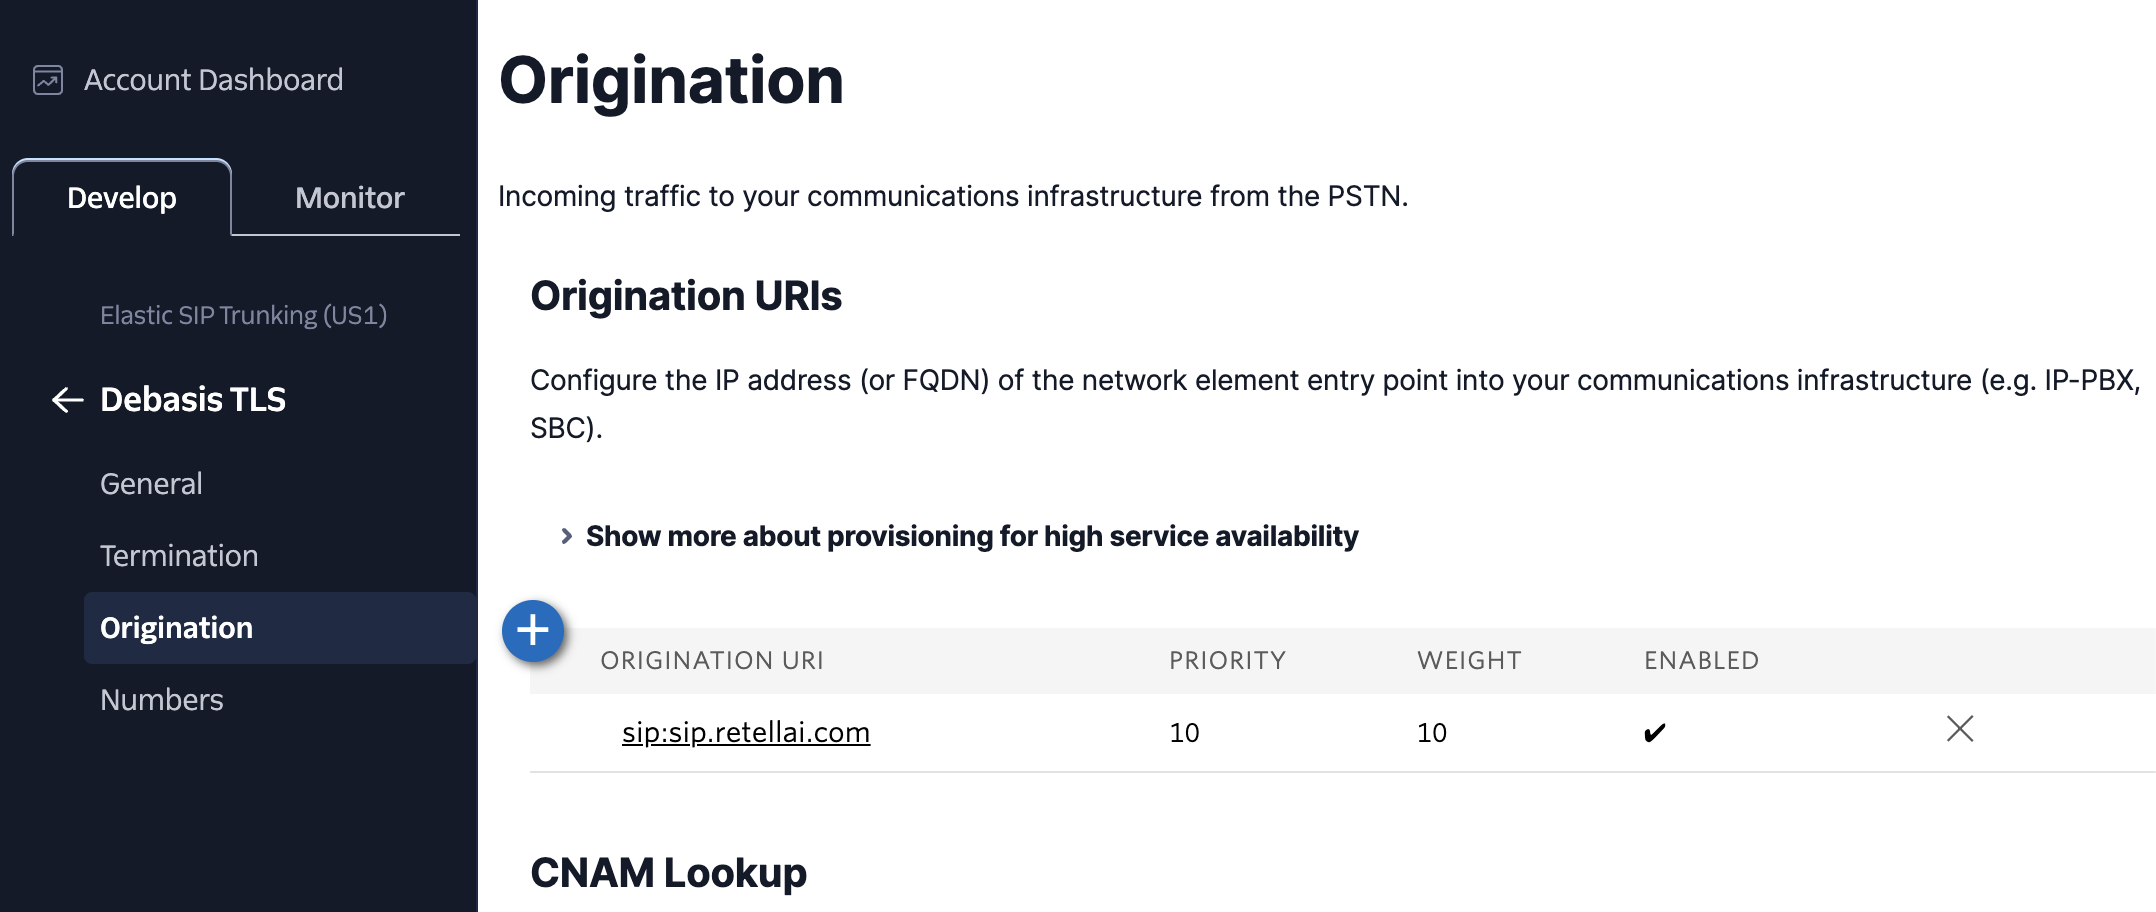
Move numbers to elastic SIP trunking
You've created the elastic SIP trunk. Now purchase numbers or move existing numbers to this trunk.
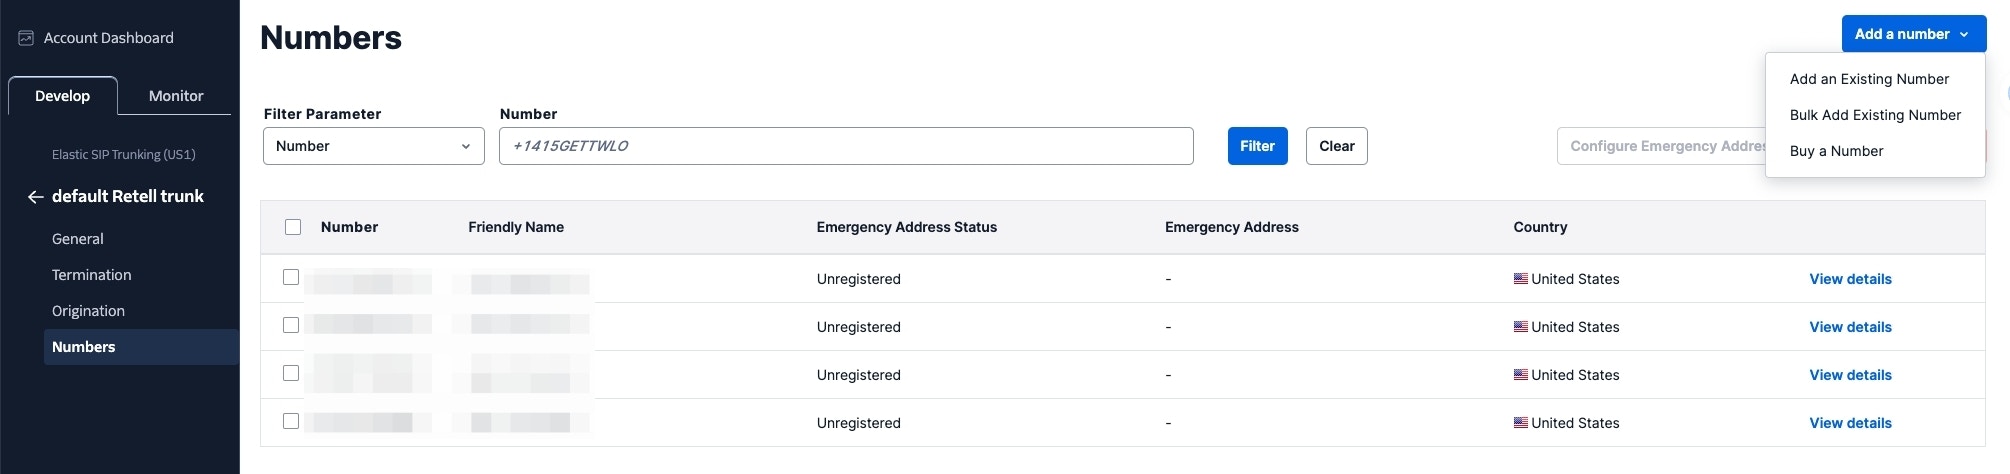
Add phone numbers in your Outbound dashboard
Now that the number is set up with your elastic SIP trunk, open your Outbound dashboard and add the number from the Phone Numbers page so Outbound knows how to route the call.
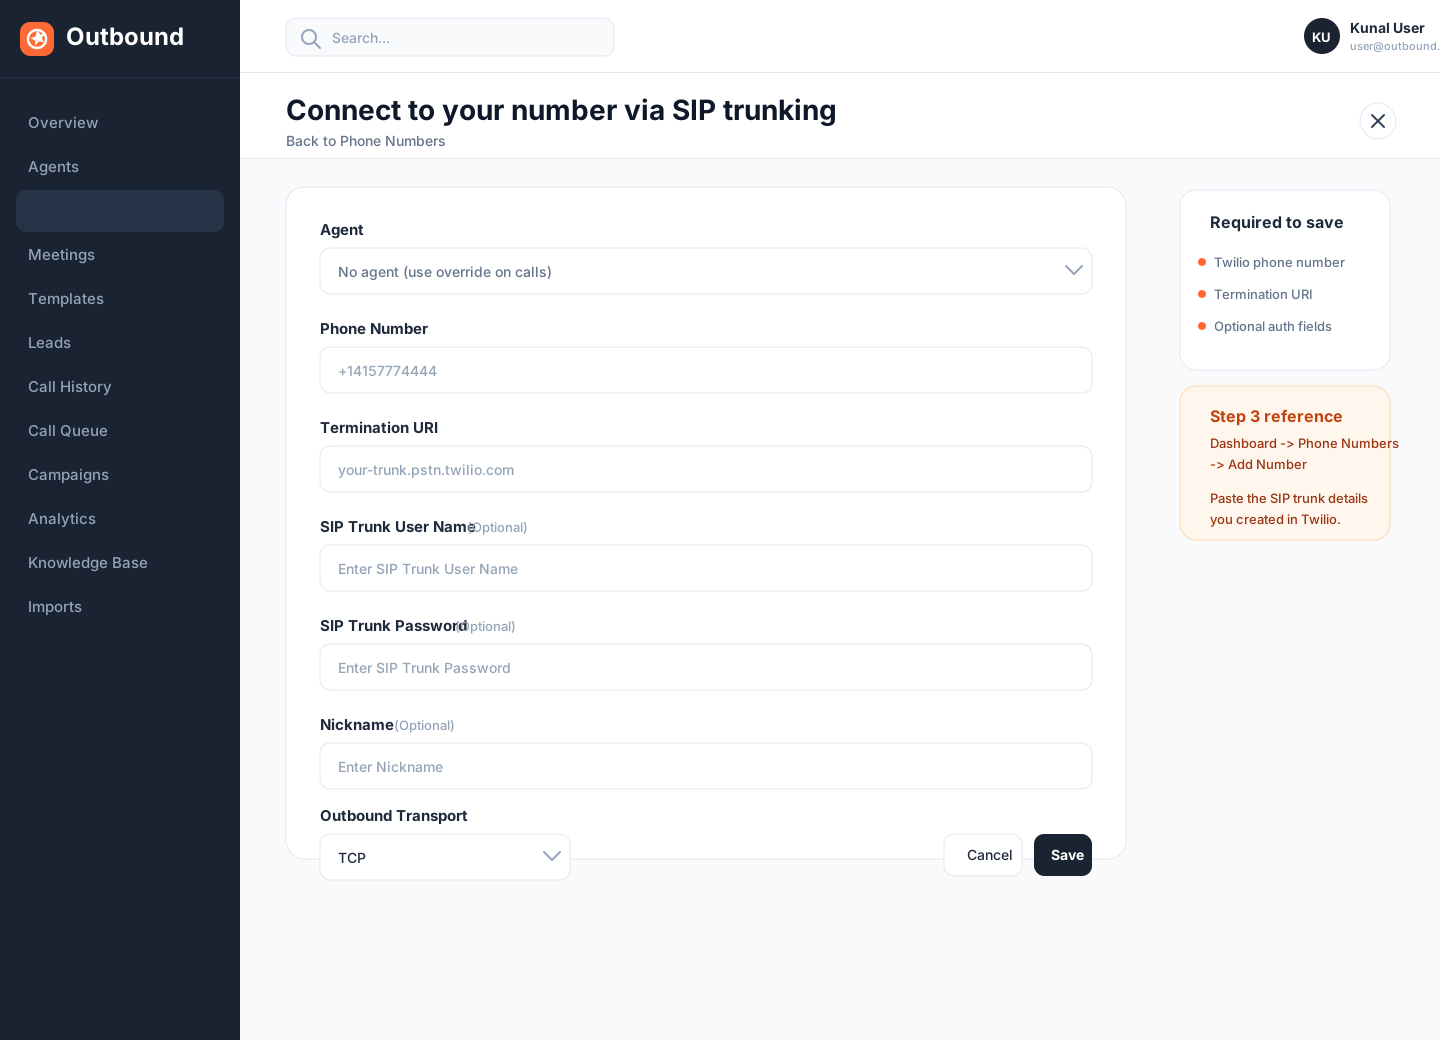
Go to Dashboard -> Phone Numbers -> Add Number.
Enter the Twilio phone number in E.164 format, then paste the termination SIP URI you saved in Step 1.
If you set up auth via credentials in Twilio, enter the same SIP trunk username and password here as well.
Once you save the number, it becomes available inside your Outbound dashboard for outbound and inbound calling.
Common issues
1. After connecting, inbound works but outbound does not?
- Check your termination SIP URI. If there's a space in it, remove it. Also use a localized termination URI near your region. See this doc to select one.
- Check your username and credentials. Make sure you entered the username and credentials shown in this dialog. Note that the username is not the friendly name shown in the credential list; double-check that you didn't confuse the two.
2. How do I set up dialing to international countries?
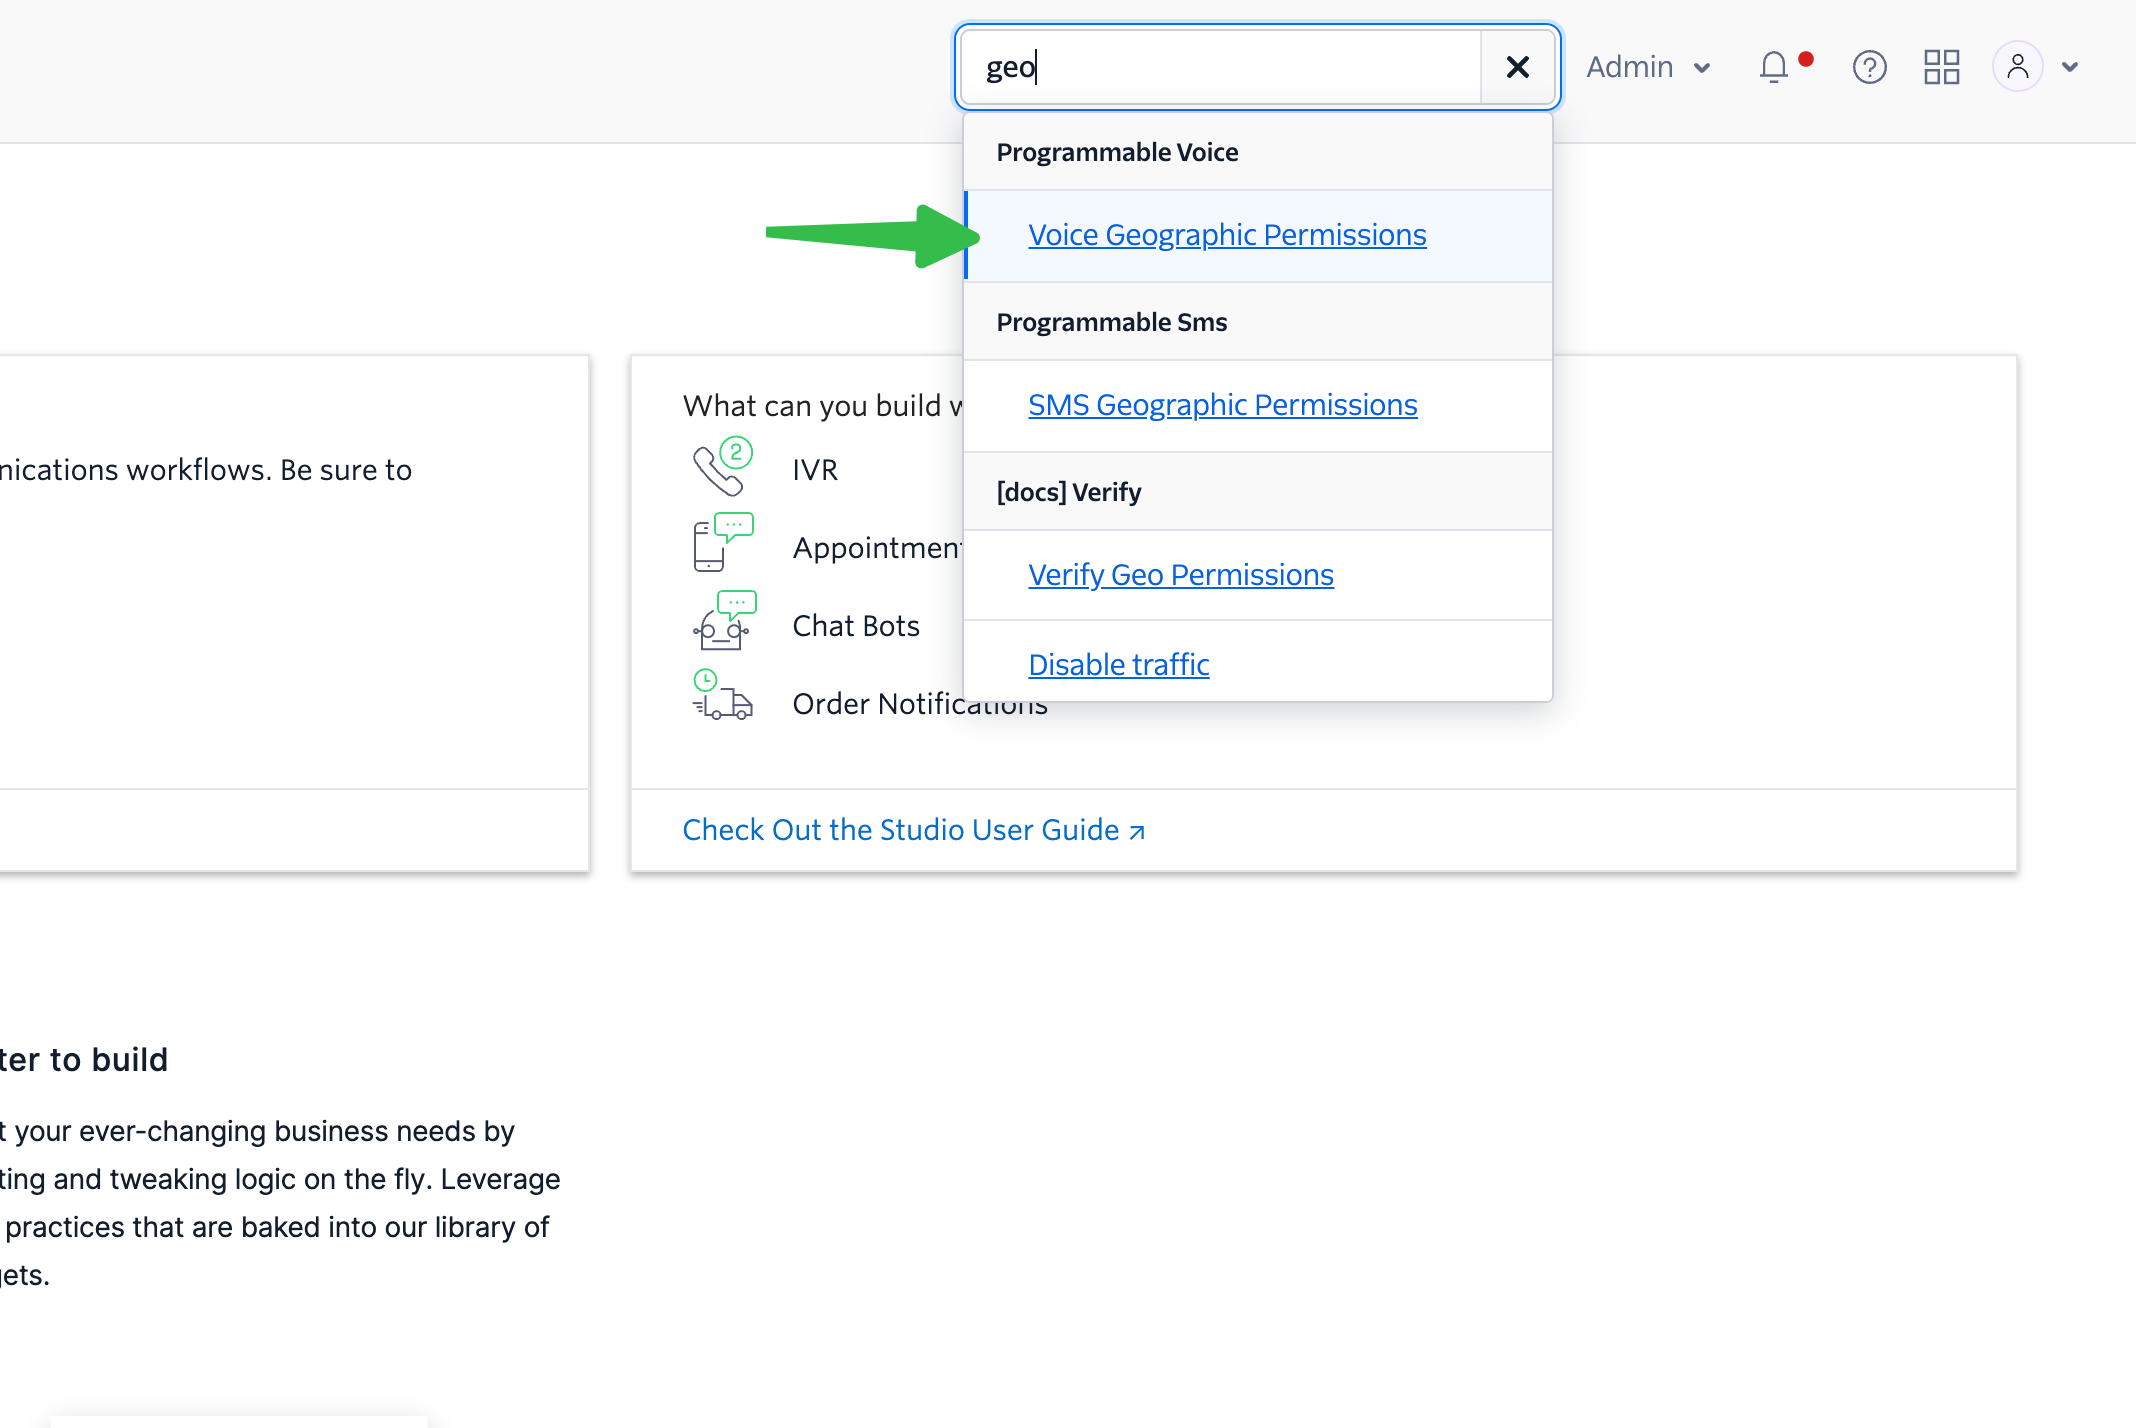
- Search "geo" to find the "Voice Geographic Permissions" setting.
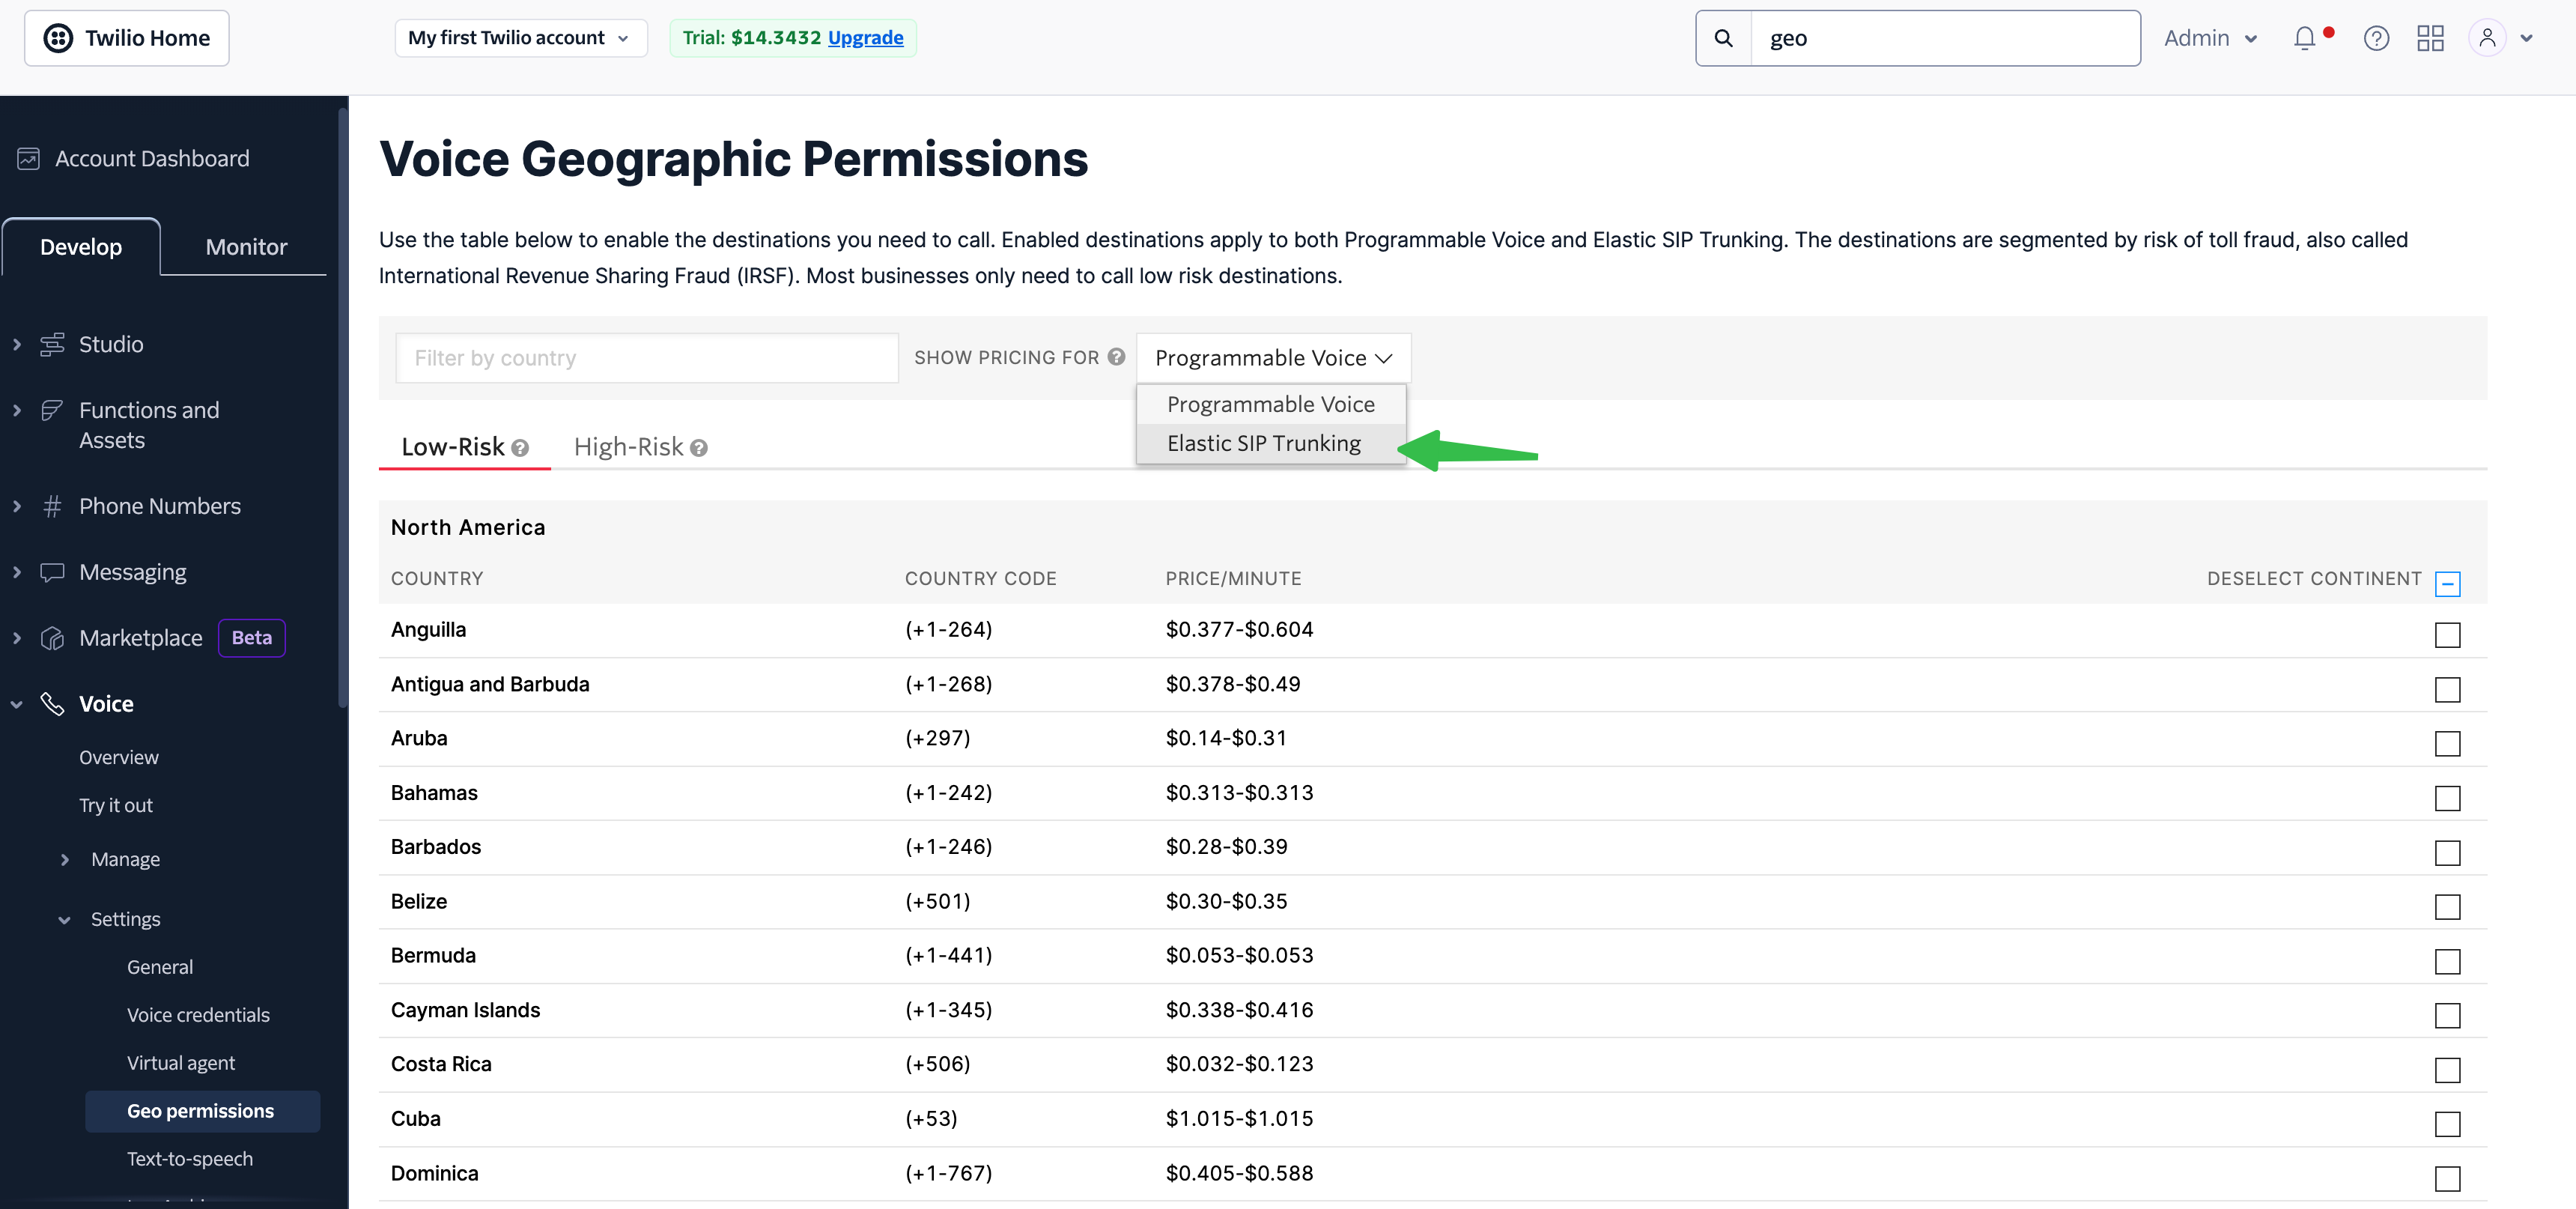
- Choose "Elastic SIP Trunking" in the selector, and select the countries you would like to dial. See International calling for Outbound's supported destinations and fees.
Still stuck? See Debug outbound call for common SIP failures, or debug SIP calls with PCAP files to inspect the signaling in Wireshark.
Phone number masking
If you have a personal phone number or a trusted business number you'd like to display to the callee, you can import verified phone numbers into Twilio to serve as the caller ID.
Add a caller ID
- Go to the Verified Caller IDs page
- Click Add a new Caller ID
- Enter the desired phone number to verify, select the desired verification method, and then click Verify Number
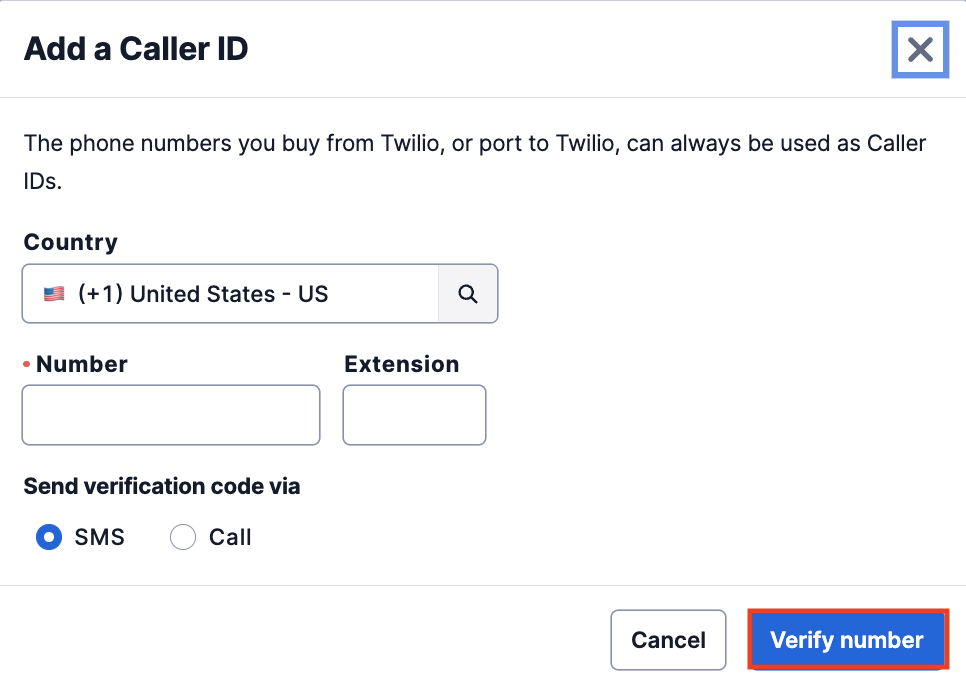
4. The number entered will receive an OTP Authentication code for verification. Enter this verification code on the next window.
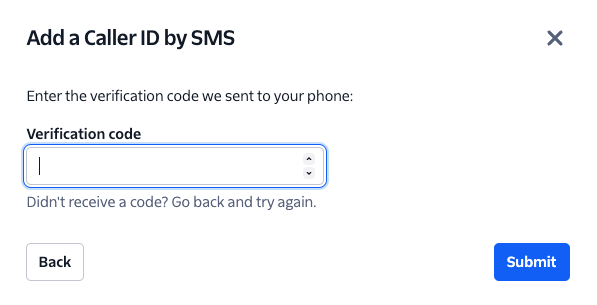
5. Once you click Submit, if the correct OTP code was entered, you will receive a Successful notification and the number will be added to your account as a verified caller ID.
Configure SIP header rules to display caller ID
This uses Twilio's own header manipulation. To set or parse custom SIP headers on the Outbound side, see the SIP headers guide.
- In the Twilio Console, navigate to Elastic SIP Trunking -> Trunks -> [your trunk] -> Termination
- Scroll down to Header Manipulation and open View all SIP header manipulation policies
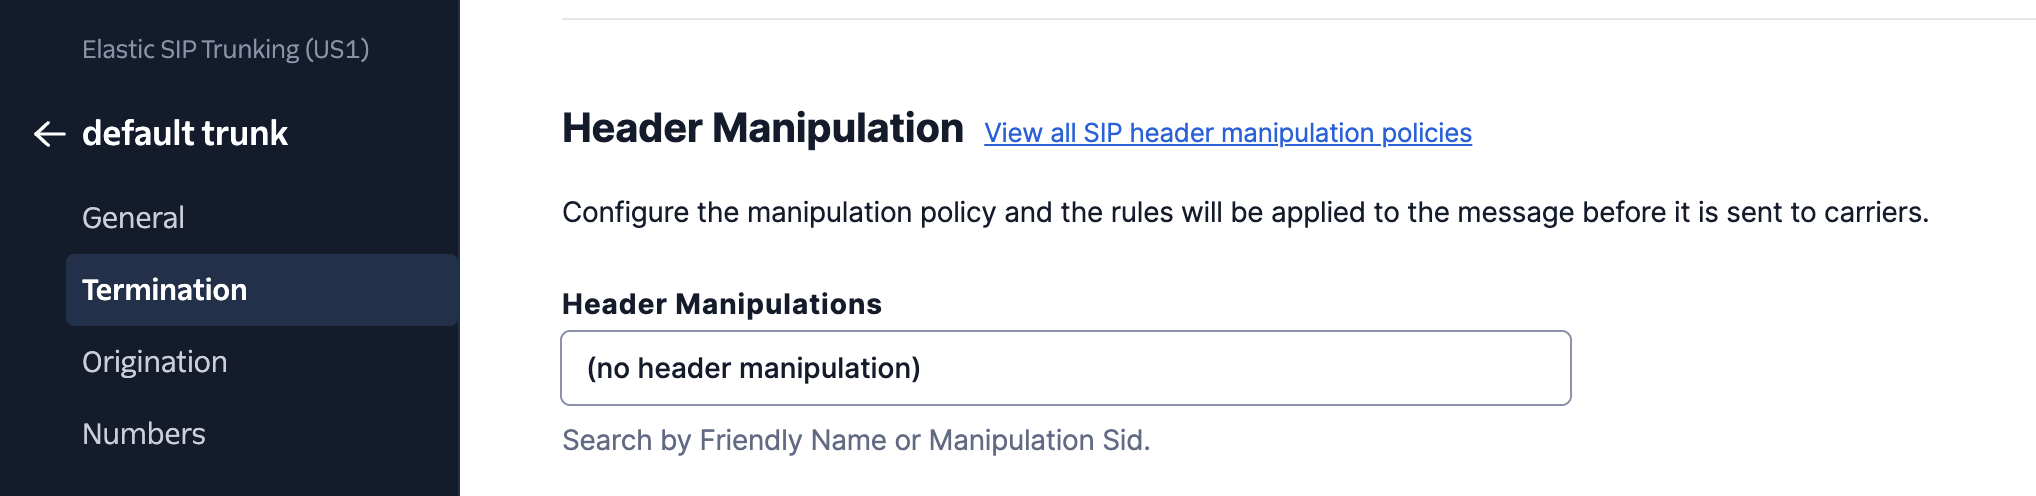
- Click on Create a policy in the top right and give your policy a friendly name
- Click on + Add request rule and give the rule a friendly name
- Under the Actions section, set the following values:
- SIP header field: From number
- Action: Replace with
- Value: Your caller ID in E.164 format (e.g. +18881230987)
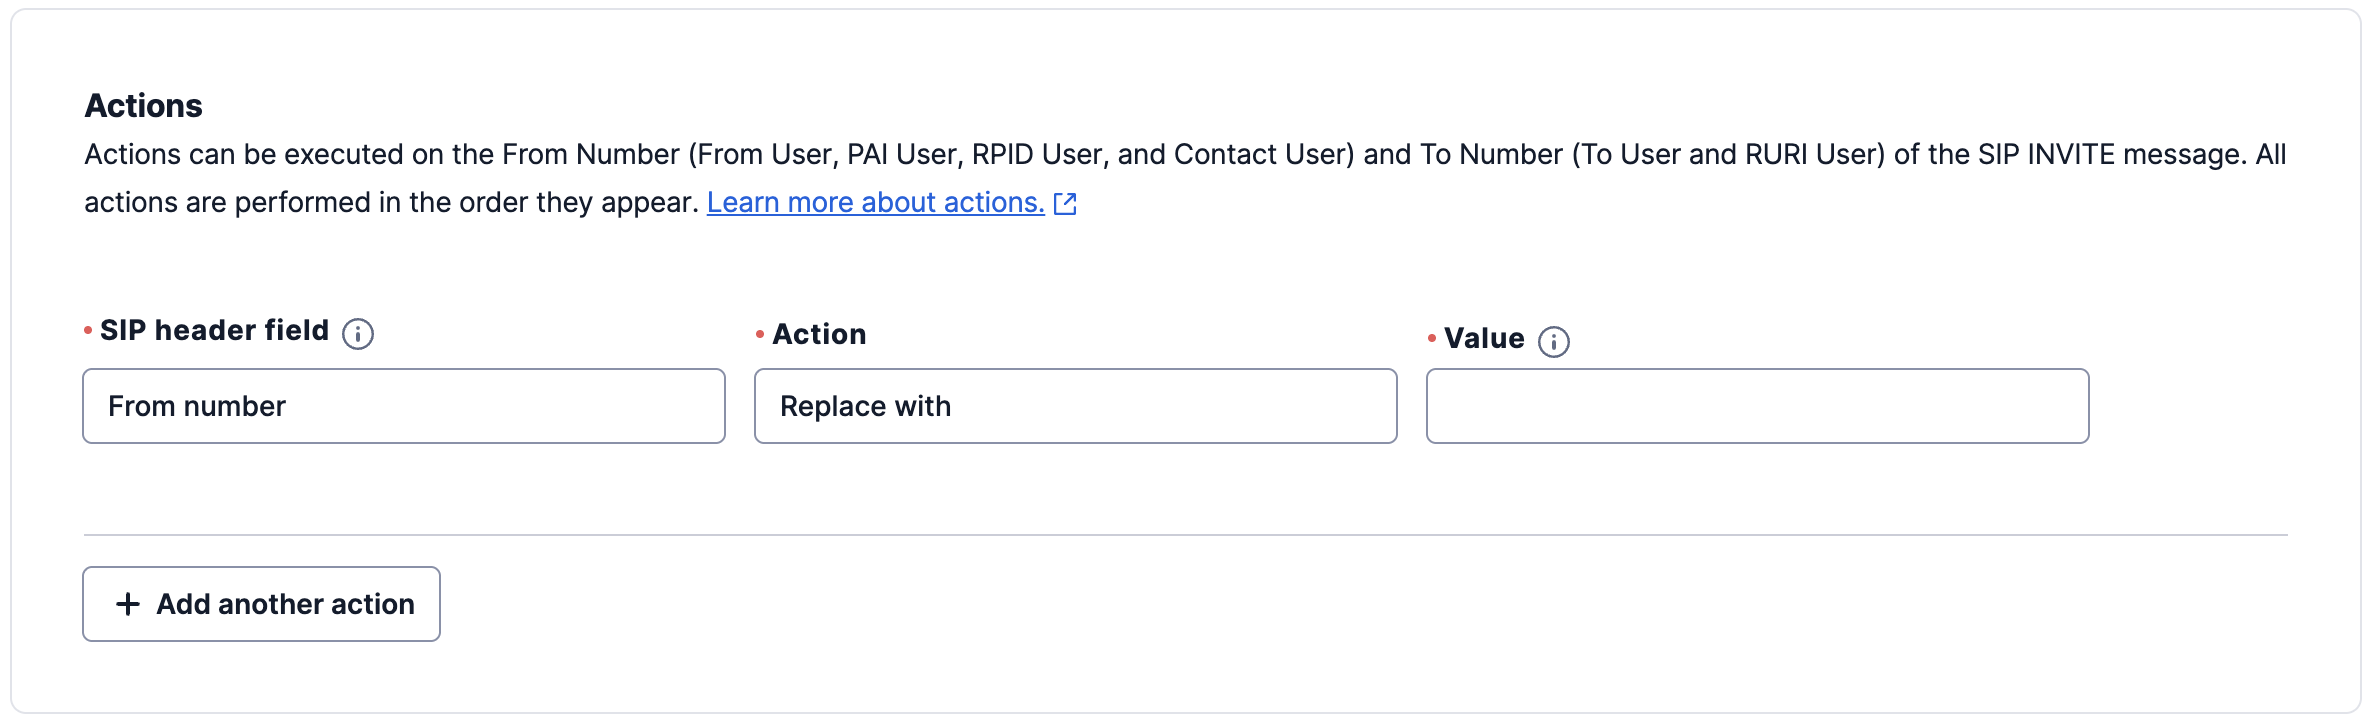
- Click Add rule, and then click Save policy
- Return to the Termination tab within your trunk, and select the new header manipulation policy from the dropdown
- Now, any number imported from this Twilio trunk into your Outbound account will use your verified caller ID. Place an outbound test call to validate the changes.
- Note: You will need at least one number purchased from Twilio in your SIP trunk in order to apply the caller ID.